Lyra Breakdown - Editor Module
You can extend the editor and engine like that? What about all the wheels I reinvented?
The content in this post is based on Unreal Engine 5.5.4
If I made a mistake, please comment below and help future readers!
This is a series of notes about what I’ve learned from Epic’s Lyra project. Which claim to be the best practices under current unreal engine framework. Some I don’t know about, some I already know but I thought it would still be good noting down.
Separated .uproject and Modules
Maybe Epic has a somewhat automated project setup method or manually renamed the uproject afterwards, but comparing with the pre-build Binary version of Lyra in EGS vs Github, the project name is different. One called LyraStarterGame and the other just called Lyra.
 Lyra from EGS
 Lyra from Github
While this is not a big deal, if we then look at the Source folder, we would see that neither Lyra nor LyraStarterGame are the modules’ name (Which it would be if we just create the project from setup wizard). Instead, they are LyraGame and LyraEditor. Again, not a big deal, but it also shows us that the uproject or the folder name is about the project itself. And in Source code, we can have a more granular control over the module name. They don’t have to be the same.
Custom Engine class
Lyra has 2 custom engine extensions, LyraGameEngine and LyraEditorEngine. In this post we will just focus on the LyraEditorEngine
UGameEngine, UEditorEngine, UUnrealEdEngine
UUnrealEdEngine inherits from UEditorEngine, that governs the actual specialized interactions inside the Unreal Editor, like how select an actor would behave, jamming more custom code before a PIE session starts, etc. Normally we want to inherit our own editor engine under UUnrealEdEngine, because UEditorEngine is a higher level abstraction of the fundamental editor engine framework, and UUnrealEdEngine already inherits from it. Otherwise we could end up with recreating the wheel for editor.
The
UEditorEnginewould be useful if we are using the engine inCommandletmode, more details can be found in this Commandlet Documentation. It would be very helpful for RBS, DevOps, and other automated tasks.
The purpose behind this extension is simple:
- In Lyra, the actual gameplay related module (or
plugins) are all under ‘Plugins/GameFeature’ folder, utilizing theGameFeaturesystem. It would be a QoL improvement to have all these plugins content shown by default in the content browser. - TEMP HACK: Another reason is to let
ULyraDeveloperSettingsandULyraPlatformEmulationSettingsto be notified from the editor engine when PIE starts. This is a temporary solution, as Epic is working on a better way to expose these settings to non-editor modules.
Show Plugin Folder - FirstTickSetup
Because all the actual game modes resides in Plugins folder as GameFeature, so Lyra want to show them by default, this is done by a FirstTickSetup function that is called in the Tick function of ULyraEditorEngine. This is a common pattern in Unreal Engine, where we want to do something only once after the first tick. The Tick function is called every frame, so we can use it to check if we are on the first tick and do our setup there.
1
2
3
4
5
6
7
8
9
10
11
12
13
14
15
16
17
18
19
void ULyraEditorEngine::Tick(float DeltaSeconds, bool bIdleMode)
{
    Super::Tick(DeltaSeconds, bIdleMode);

    FirstTickSetup();
}

void ULyraEditorEngine::FirstTickSetup()
{
    if (bFirstTickSetup)
    {
        return;
    }

    bFirstTickSetup = true;

    // Force show plugin content on load.
    GetMutableDefault<UContentBrowserSettings>()->SetDisplayPluginFolders(true);
}
Call DeveloperSettings and PlatformEmulationSettings
As mentioned in the comment, it currently directly coupled ULyraDeveloperSettings and ULyraPlatformEmulationSettings, a better way would be expose a bindable delegate for a non-editor module to bind, this would be a bit more complicated because we don’t want to have our game module depend on the editor module
1
2
3
4
5
6
7
8
9
10
11
12
13
14
15
16
17
18
19
20
21
22
23
24
25
26
27
28
FGameInstancePIEResult ULyraEditorEngine::PreCreatePIEInstances(const bool bAnyBlueprintErrors, const bool bStartInSpectatorMode, const float PIEStartTime, const bool bSupportsOnlinePIE, int32& InNumOnlinePIEInstances)
{
if (const ALyraWorldSettings* LyraWorldSettings = Cast<ALyraWorldSettings>(EditorWorld->GetWorldSettings()))
{
if (LyraWorldSettings->ForceStandaloneNetMode)
{
EPlayNetMode OutPlayNetMode;
PlaySessionRequest->EditorPlaySettings->GetPlayNetMode(OutPlayNetMode);
if (OutPlayNetMode != PIE_Standalone)
{
PlaySessionRequest->EditorPlaySettings->SetPlayNetMode(PIE_Standalone);
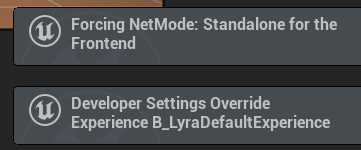
FNotificationInfo Info(LOCTEXT("ForcingStandaloneForFrontend", "Forcing NetMode: Standalone for the Frontend"));
Info.ExpireDuration = 2.0f;
FSlateNotificationManager::Get().AddNotification(Info);
}
}
}
//@TODO: Should add delegates that a *non-editor* module could bind to for PIE start/stop instead of poking directly
GetDefault<ULyraDeveloperSettings>()->OnPlayInEditorStarted();
GetDefault<ULyraPlatformEmulationSettings>()->OnPlayInEditorStarted();
//
FGameInstancePIEResult Result = Super::PreCreatePIEServerInstance(bAnyBlueprintErrors, bStartInSpectatorMode, PIEStartTime, bSupportsOnlinePIE, InNumOnlinePIEInstances);
return Result;
}
Configure Custom Engine Class
Once we’ve defined our own Custom GameEngine and EditorEngine, they can be configured under DefaultEngine.ini - [/Script/Engine.Engine]
1
2
3
4
[/Script/Engine.Engine]
GameEngine=/Script/LyraGame.LyraGameEngine
UnrealEdEngine=/Script/LyraEditor.LyraEditorEngine
EditorEngine=/Script/LyraEditor.LyraEditorEngine
Custom Configurable Variables
The DefaultEngine.ini file is a configuration file that contains settings for the Unreal Engine. But we can also create our own custom config variables that stays in a project specific config file. This is useful for separating settings that are specific to our game from the default engine settings.
In order to do so, we can just use a config specifier in our class declaration, followed by the name of the config file we want to use. For example in Lyra, the ULyraDeveloperSettings class is configured to use EditorPerProjectUserSettings config.
1
2
3
4
5
UCLASS(config=EditorPerProjectUserSettings, MinimalAPI)
class ULyraDeveloperSettings : public UDeveloperSettingsBackedByCVars
{
    //...
}
That’s only the first step, we also need to expose the variables we want to be configurable in the ini file. This is done by using the config specifier in our property declaration. For example, in Lyra, the CommonEditorMaps variable is declared as follows:
1
2
3
4
5
#if WITH_EDITORONLY_DATA
    /** A list of common maps that will be accessible via the editor toolbar */
    UPROPERTY(config, EditAnywhere, BlueprintReadOnly, Category=Maps, meta=(AllowedClasses="/Script/Engine.World"))
    TArray<FSoftObjectPath> CommonEditorMaps;
#endif
In the end, we can put them into the config file, since this is a TArray, we can just use the + sign to add new entries.
1
2
3
4
5
6
7
; Some commonly used editor maps that will be displayed in the editor task bar
[/Script/LyraGame.LyraDeveloperSettings]
+CommonEditorMaps=/Game/System/FrontEnd/Maps/L_LyraFrontEnd.L_LyraFrontEnd
+CommonEditorMaps=/Game/System/DefaultEditorMap/L_DefaultEditorOverview.L_DefaultEditorOverview
+CommonEditorMaps=/ShooterMaps/Maps/L_Expanse.L_Expanse
+CommonEditorMaps=/ShooterCore/Maps/L_ShooterGym.L_ShooterGym
+CommonEditorMaps=/ShooterTests/Maps/L_ShooterTest_DeviceProperties.L_ShooterTest_DeviceProperties
For more information about Config files, Epic has provided a Config File Documentation that touchs the details of how it works.
GetOptions meta
GetOptions meta allow a property to be displayed as a dropdown in the editor. Based on a function that returns a list of options.
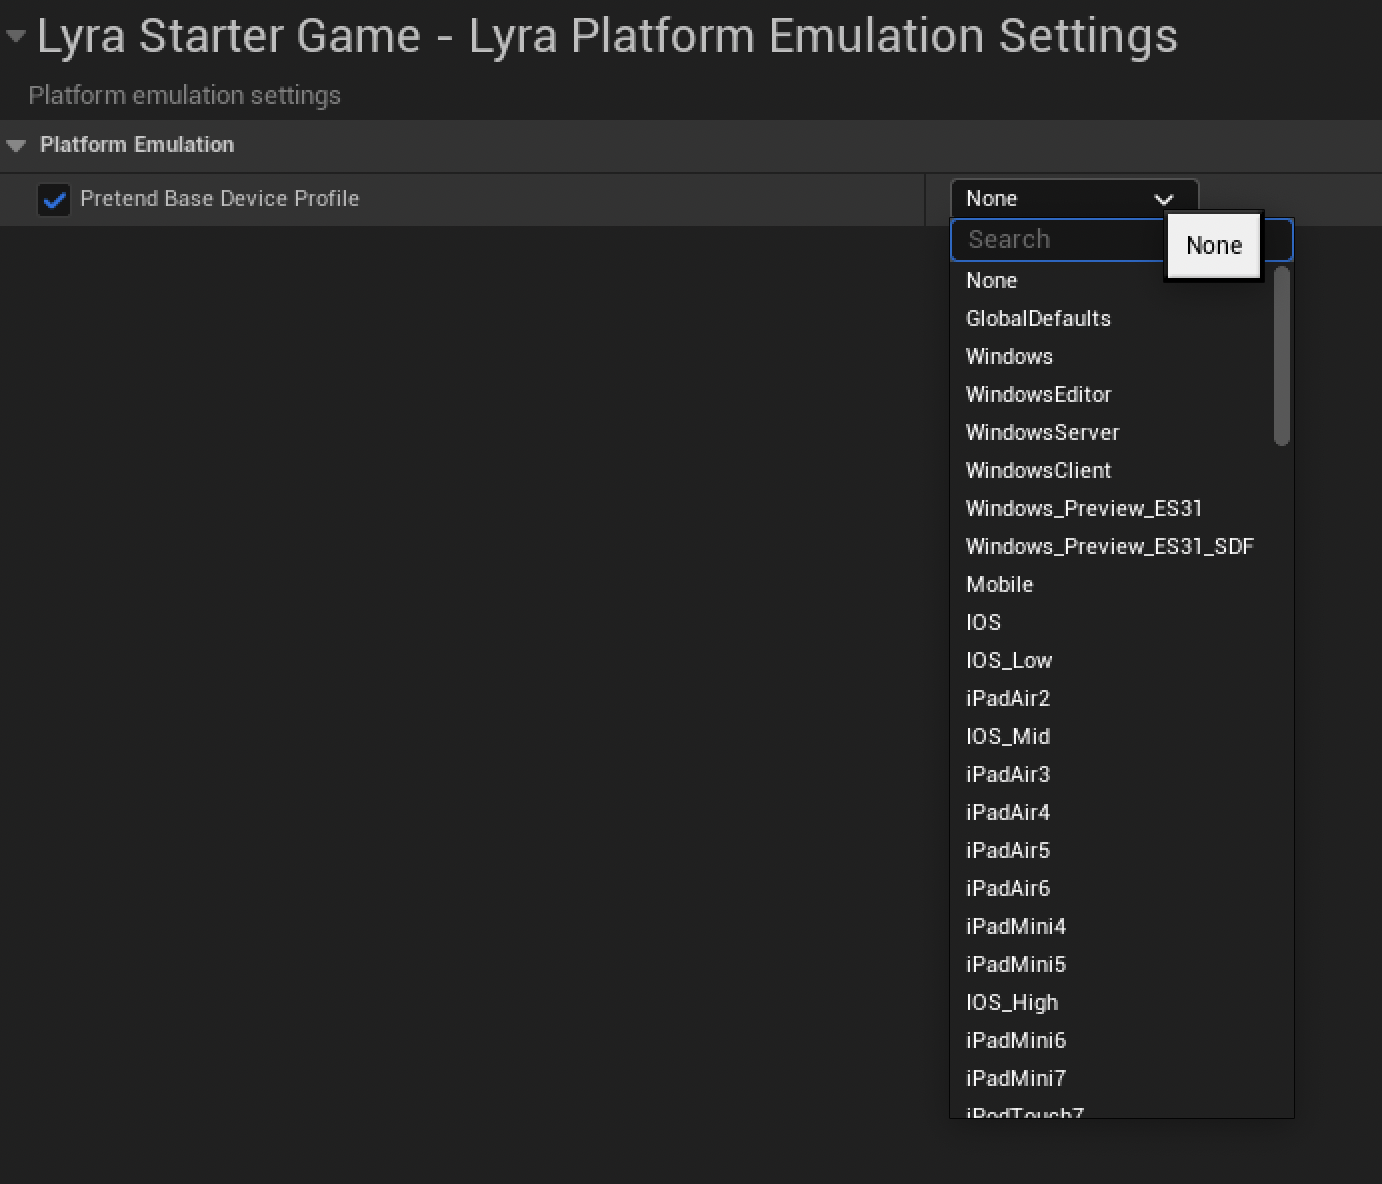
In the case of ULyraPlatformEmulationSettings, there’s a PretendPlatform member, which is used to display a list of known platform IDs as a dropdown. This is done by creating a function that returns an array of FName and using the GetOptions meta on the property.
 GetOptions Meta
1
2
3
4
5
6
7
8
9
10
11
12
13
14
15
16
17
18
19
20
21
22
23
24
25
26
27
28
29
/**
 * Platform emulation settings
 */
UCLASS(config=EditorPerProjectUserSettings, MinimalAPI)
class ULyraPlatformEmulationSettings : public UDeveloperSettingsBackedByCVars
{
    // ...
private:
    UPROPERTY(EditAnywhere, config, Category=PlatformEmulation, meta=(GetOptions=GetKnownPlatformIds))
    FName PretendPlatform;

    // ...
    UFUNCTION()
    TArray<FName> GetKnownPlatformIds() const;

    //...
}

TArray<FName> ULyraPlatformEmulationSettings::GetKnownPlatformIds() const
{
    TArray<FName> Results;

#if WITH_EDITOR
    Results.Add(NAME_None);
    Results.Append(UPlatformSettingsManager::GetKnownAndEnablePlatformIniNames());
#endif

    return Results;
}
This is also quite useful to mark a parameter in a function as a dropdown. Like the following example, the parameter ProfileName is marked as a dropdown, and the options are generated by the function GetCollisionProfileNames. This is done by using the UPARAM macro with the Meta specifier. This also means that we can have an inline Macro to decorate a function parameter.
1
2
UFUNCTION(BlueprintCallable, ...)
static ENGINE_API bool LineTraceSingleByProfile(..., UPARAM(Meta=(GetOptions="Engine.KismetSystemLibrary.GetCollisionProfileNames")) FName ProfileName, ...);
Set a toast notification
Sometimes we want to show a toast notification in the editor, this can be done by using the FSlateNotificationManager class. This class provides a way to create and display notifications in the editor. In the following example, we can notify the developer that some settings are set in the ULyraDeveloperSettings class. This is done by creating a FNotificationInfo object and passing it to the AddNotification function of the FSlateNotificationManager class.
1
2
3
4
5
6
7
8
9
10
11
12
13
14
15
16
17
18
19
20
21
22
23
24
25
26
27
28
29
30
31
32
33
FGameInstancePIEResult ULyraEditorEngine::PreCreatePIEInstances(const bool bAnyBlueprintErrors, const bool bStartInSpectatorMode, const float PIEStartTime, const bool bSupportsOnlinePIE, int32& InNumOnlinePIEInstances)
{
    if (const ALyraWorldSettings* LyraWorldSettings = Cast<ALyraWorldSettings>(EditorWorld->GetWorldSettings()))
    {
        if (LyraWorldSettings->ForceStandaloneNetMode)
        {
            EPlayNetMode OutPlayNetMode;
            PlaySessionRequest->EditorPlaySettings->GetPlayNetMode(OutPlayNetMode);
            if (OutPlayNetMode != PIE_Standalone)
            {
                PlaySessionRequest->EditorPlaySettings->SetPlayNetMode(PIE_Standalone);

                FNotificationInfo Info(LOCTEXT("ForcingStandaloneForFrontend", "Forcing NetMode: Standalone for the Frontend"));
                Info.ExpireDuration = 2.0f;
                FSlateNotificationManager::Get().AddNotification(Info);
            }
        }
    }
}

void ULyraDeveloperSettings::OnPlayInEditorStarted() const
{
    // Show a notification toast to remind the user that there's an experience override set
    if (ExperienceOverride.IsValid())
    {
        FNotificationInfo Info(FText::Format(
            LOCTEXT("ExperienceOverrideActive", "Developer Settings Override\nExperience {0}"),
            FText::FromName(ExperienceOverride.PrimaryAssetName)
        ));
        Info.ExpireDuration = 2.0f;
        FSlateNotificationManager::Get().AddNotification(Info);
    }
}
Create a new asset class
Often, the existing class doesn’t suffice our needs, and we would like to create more exotic things like having a custom editor for a custom class type. Or, we want to register a new asset type which will directly show under the content browser (As a new asset type, rather than a blueprint class)

We won’t touch the details on how to create it, since it’s been well documented in this Community Post already.
Improve compile performance
There’s a macro UE_INLINE_GENERATED_CPP_BY_NAME that can be used to improve compile performance. Introduced from UE5.1 UE5.1 Official Release Note Most of the classes in Lyra have this macro at the start of the cpp file after other includes. For example:
1
2
3
4
5
6
7
8
9
10
// Copyright Epic Games, Inc. All Rights Reserved.

#include "LyraGameViewportClient.h"

#include "CommonUISettings.h"
#include "ICommonUIModule.h"

#include UE_INLINE_GENERATED_CPP_BY_NAME(LyraGameViewportClient)

//... Actual Class Implementation
Custom PIE Behavior
As mentioned before, we can actually write different behaviors when the game is PIE. Since PIE is a case that only happens in the editor, we can poke the game module function when PIE started.
1
2
3
4
5
6
7
8
9
10
11
12
13
14
15
16
17
18
19
20
21
22
23
24
25
26
27
/**
 * FLyraEditorModule
 */
class FLyraEditorModule : public FDefaultGameModuleImpl
{
    // ...
    virtual void StartupModule() override
    {
        FGameEditorStyle::Initialize();

        if (!IsRunningGame())
        {
            // ...
            FEditorDelegates::BeginPIE.AddRaw(this, &ThisClass::OnBeginPIE);
            FEditorDelegates::EndPIE.AddRaw(this, &ThisClass::OnEndPIE);
        }
        // ...
    }

    void OnBeginPIE(bool bIsSimulating)
    {
        ULyraExperienceManager* ExperienceManager = GEngine->GetEngineSubsystem<ULyraExperienceManager>();
        check(ExperienceManager);
        ExperienceManager->OnPlayInEditorBegun();
    }
    //...
}
Custom Editor Button Extension
We can create custom editor buttons to do some dev-time validations or automation tasks, this basically just require us to create a FToolMenuEntry and add it to the FToolMenuSection section, which belongs to UToolMenu: LevelEditor.LevelEditorToolBar.PlayToolBar.
1
2
3
4
5
6
7
8
9
10
11
12
13
14
15
16
17
18
19
20
21
22
23
24
25
26
27
28
29
30
31
32
33
34
35
36
37
38
39
40
41
42
43
44
45
46
47
48
49
50
51
52
53
54
55
56
57
58
59
60
61
62
63
64
65
66
67
68
69
70
71
72
73
74
75
/**
 * FLyraEditorModule
 */
class FLyraEditorModule : public FDefaultGameModuleImpl
{
    // ...
    virtual void StartupModule() override
    {
        FGameEditorStyle::Initialize();

        if (!IsRunningGame())
        {
            // ...
            if (FSlateApplication::IsInitialized())
            {
                ToolMenusHandle = UToolMenus::RegisterStartupCallback(FSimpleMulticastDelegate::FDelegate::CreateStatic(&RegisterGameEditorMenus));
            }

            // ...
        }
    }
    // ...
}

static void RegisterGameEditorMenus()
{
    UToolMenu* Menu = UToolMenus::Get()->ExtendMenu("LevelEditor.LevelEditorToolBar.PlayToolBar");
    FToolMenuSection& Section = Menu->AddSection("PlayGameExtensions", TAttribute<FText>(), FToolMenuInsert("Play", EToolMenuInsertType::After));

    // Uncomment this to add a custom toolbar that is displayed during PIE
    // Useful for making easy access to changing game state artificially, adding cheats, etc
    // FToolMenuEntry BlueprintEntry = FToolMenuEntry::InitComboButton(
    //     "OpenGameMenu",
    //     FUIAction(
    //         FExecuteAction(),
    //         FCanExecuteAction::CreateStatic(&HasPlayWorld),
    //         FIsActionChecked(),
    //         FIsActionButtonVisible::CreateStatic(&HasPlayWorld)),
    //     FOnGetContent::CreateStatic(&YourCustomMenu),
    //     LOCTEXT("GameOptions_Label", "Game Options"),
    //     LOCTEXT("GameOptions_ToolTip", "Game Options"),
    //     FSlateIcon(FAppStyle::GetAppStyleSetName(), "LevelEditor.OpenLevelBlueprint")
    // );
    // BlueprintEntry.StyleNameOverride = "CalloutToolbar";
    // Section.AddEntry(BlueprintEntry);

    FToolMenuEntry CheckContentEntry = FToolMenuEntry::InitToolBarButton(
        "CheckContent",
        FUIAction(
            FExecuteAction::CreateStatic(&CheckGameContent_Clicked),
            FCanExecuteAction::CreateStatic(&HasNoPlayWorld),
            FIsActionChecked(),
            FIsActionButtonVisible::CreateStatic(&HasNoPlayWorld)),
        LOCTEXT("CheckContentButton", "Check Content"),
        LOCTEXT("CheckContentDescription", "Runs the Content Validation job on all checked out assets to look for warnings and errors"),
        FSlateIcon(FGameEditorStyle::GetStyleSetName(), "GameEditor.CheckContent")
    );
    CheckContentEntry.StyleNameOverride = "CalloutToolbar";
    Section.AddEntry(CheckContentEntry);

    FToolMenuEntry CommonMapEntry = FToolMenuEntry::InitComboButton(
        "CommonMapOptions",
        FUIAction(
            FExecuteAction(),
            FCanExecuteAction::CreateStatic(&HasNoPlayWorld),
            FIsActionChecked(),
            FIsActionButtonVisible::CreateStatic(&CanShowCommonMaps)),
        FOnGetContent::CreateStatic(&GetCommonMapsDropdown),
        LOCTEXT("CommonMaps_Label", "Common Maps"),
        LOCTEXT("CommonMaps_ToolTip", "Some commonly desired maps while using the editor"),
        FSlateIcon(FAppStyle::GetAppStyleSetName(), "Icons.Level")
    );
    CommonMapEntry.StyleNameOverride = "CalloutToolbar";
    Section.AddEntry(CommonMapEntry);
}
Check Content Button - ToolBar Button
The check content button is pretty straight forward, when clicked, it performs the validation tasks, this is done by calling CheckGameContent_Clicked function. In this example, it just called the internal UEditorValidator::ValidateCheckedOutContent function.
1
2
3
4
5
6
7
8
9
10
11
12
13
14
FToolMenuEntry CheckContentEntry = FToolMenuEntry::InitToolBarButton(
    "CheckContent",
    FUIAction(
        FExecuteAction::CreateStatic(&CheckGameContent_Clicked),
        // ...
        ),
        // ...
        FSlateIcon(FGameEditorStyle::GetStyleSetName(), "GameEditor.CheckContent")
    );

static void CheckGameContent_Clicked()
{
    UEditorValidator::ValidateCheckedOutContent(/*bInteractive=*/true, EDataValidationUsecase::Manual);
}
Common Maps Dropdown - Combo Button
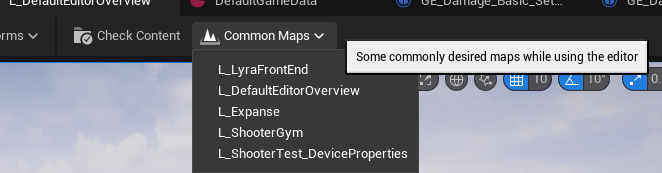
This would ba a bit tricky, in this case when we click the button, we don’t want to perform anything, but instead, we will show a drop down menu, showcasing all related maps, when the user clicked one available map, OpenCommonMap_Clicked will then be called.
So the logic here is we are creating a ComboButton instead of a regular ToolBarButton, and we are using FOnGetContent to create a dropdown menu. The FMenuBuilder class is used to create the menu, and we can add entries to it using the AddMenuEntry function. Each entry has a display name, a tooltip, and an action to perform when clicked. When we clicked one options, it responds with OpenEditorForAsset function, which will open the selected map in the editor.
1
2
3
4
5
6
7
8
9
10
11
12
13
14
15
16
17
18
19
20
21
22
23
24
25
26
27
28
29
30
31
32
33
34
35
static TSharedRef<SWidget> GetCommonMapsDropdown()
{
    FMenuBuilder MenuBuilder(true, nullptr);

    for (const FSoftObjectPath& Path : GetDefault<ULyraDeveloperSettings>()->CommonEditorMaps)
    {
        if (!Path.IsValid())
        {
            continue;
        }

        const FText DisplayName = FText::FromString(Path.GetAssetName());
        MenuBuilder.AddMenuEntry(
            DisplayName,
            LOCTEXT("CommonPathDescription", "Opens this map in the editor"),
            FSlateIcon(),
            FUIAction(
                FExecuteAction::CreateStatic(&OpenCommonMap_Clicked, Path.ToString()),
                FCanExecuteAction::CreateStatic(&HasNoPlayWorld),
                FIsActionChecked(),
                FIsActionButtonVisible::CreateStatic(&HasNoPlayWorld)
            )
        );
    }

    return MenuBuilder.MakeWidget();
}

static void OpenCommonMap_Clicked(const FString MapPath)
{
    if (ensure(MapPath.Len()))
    {
        GEditor->GetEditorSubsystem<UAssetEditorSubsystem>()->OpenEditorForAsset(MapPath);
    }
}
Notice the for (const FSoftObjectPath& Path : GetDefault<ULyraDeveloperSettings>()->CommonEditorMaps) line, this is getting the CommonEditorMaps property, which has been mentioned previously, is a confugurable property in the ULyraDeveloperSettings class. This is a good example of how we can use the GetDefault function to access the default settings of a class from an ini file.
1
2
3
4
5
6
7
; Some commonly used editor maps that will be displayed in the editor task bar
[/Script/LyraGame.LyraDeveloperSettings]
+CommonEditorMaps=/Game/System/FrontEnd/Maps/L_LyraFrontEnd.L_LyraFrontEnd
+CommonEditorMaps=/Game/System/DefaultEditorMap/L_DefaultEditorOverview.L_DefaultEditorOverview
+CommonEditorMaps=/ShooterMaps/Maps/L_Expanse.L_Expanse
+CommonEditorMaps=/ShooterCore/Maps/L_ShooterGym.L_ShooterGym
+CommonEditorMaps=/ShooterTests/Maps/L_ShooterTest_DeviceProperties.L_ShooterTest_DeviceProperties
Singleton for Editor Style
In the above example, when we created the bottons, we actually also defined their icon appearance.
1
2
3
4
5
    FToolMenuEntry CheckContentEntry = FToolMenuEntry::InitToolBarButton(
        "CheckContent",
        // ...
        FSlateIcon(FGameEditorStyle::GetStyleSetName(), "GameEditor.CheckContent")
    );
While we can define the actual button icon directly, we can also wrap them up in a more centralized place, in this case, GameEditor.CheckContent is actually being set inside a simple FGameEditorStyle singleton. When initialized, it just creates a StyleInstance and register it to the FSlateStyleRegistry. This is a common pattern in Unreal Engine, where we want to create a centralized place to manage our styles and resources. The actual icon located in Content/Editor/Slate/Icons/CheckContent.svg.
1
2
3
4
5
6
7
8
9
10
11
12
13
14
15
16
17
18
19
20
21
22
23
24
25
26
27
28
29
30
31
TSharedPtr< FSlateStyleSet > FGameEditorStyle::StyleInstance = nullptr;

void FGameEditorStyle::Initialize()
{
    if ( !StyleInstance.IsValid() )
    {
        StyleInstance = Create();
        FSlateStyleRegistry::RegisterSlateStyle( *StyleInstance );
    }
}

TSharedRef< FSlateStyleSet > FGameEditorStyle::Create()
{
    TSharedRef<FSlateStyleSet> StyleRef = MakeShareable(new FSlateStyleSet(FGameEditorStyle::GetStyleSetName()));
    StyleRef->SetContentRoot(FPaths::EngineContentDir() / TEXT("Editor/Slate"));
    StyleRef->SetCoreContentRoot(FPaths::EngineContentDir() / TEXT("Slate"));

    FSlateStyleSet& Style = StyleRef.Get();

    const FVector2D Icon16x16(16.0f, 16.0f);
    const FVector2D Icon20x20(20.0f, 20.0f);
    const FVector2D Icon40x40(40.0f, 40.0f);
    const FVector2D Icon64x64(64.0f, 64.0f);

    // Toolbar
    {
        Style.Set("GameEditor.CheckContent", new GAME_IMAGE_BRUSH_SVG("Icons/CheckContent", Icon20x20));
    }

    return StyleRef;
}
This pattern should be useful for a variety of cases. We just need to find a proper place to Initialize it. For Lyra, this is literally the first line in the StartupModule function of FLyraEditorModule.
1
2
3
4
5
    virtual void StartupModule() override
    {
        FGameEditorStyle::Initialize();
        // ...
    }
Auto Console Commands
FAutoConsoleCommandWithWorldArgsAndOutputDevice is a class that allows us to easily create console commands that can be executed, typical syntax looks like this:
1
2
3
4
5
6
7
8
9
FAutoConsoleCommandWithWorldArgsAndOutputDevice GCreateRedirectorPackage(
    TEXT("Lyra.CreateRedirectorPackage"),
    TEXT("Usage:\n")
    TEXT("  Lyra.CreateRedirectorPackage RedirectorName TargetPackage"),
    FConsoleCommandWithWorldArgsAndOutputDeviceDelegate::CreateStatic(
        [](const TArray<FString>& Params, UWorld* World, FOutputDevice& Ar)
    {
        // ... Implementation
    }));
As can be seen above, the actual implementation is done through a lambda function bind to the FConsoleCommandWithWorldArgsAndOutputDeviceDelegate. The WithWorldArgsAndOutputDevice part simply describes the delegate signature, which is a function that takes a TArray<FString> as the first parameter, a UWorld* as the second parameter, and a FOutputDevice& as the third parameter. All the parameters that the user actually typed in the console will be passed to the first parameter as a TArray<FString>. And we can just extract the parameters from the array normally.
In Lyra, there are 3 commands as an example:
GCheckChaosMeshCollisionCmd- Used to check the mesh collision of a given asset
GCreateRedirectorPackage- Used to create a redirector package for a given asset
GDiffCollectionReferenceSupport- Used to check the collection reference support diff from an old and new collection
MinimalAPI and LYRAGAME_API
There aren’t too much fancy stuff here, just a side note that we need to have the PROJECT_API macro used to export the function, and MinimalAPI is used to export the class.
1
2
3
4
5
6
7
8
9
10
11
12
13
/**
 * Manager for experiences - primarily for arbitration between multiple PIE sessions
 */
UCLASS(MinimalAPI)
class ULyraExperienceManager : public UEngineSubsystem
{
    GENERATED_BODY()

public:
#if WITH_EDITOR
    LYRAGAME_API void OnPlayInEditorBegun();
    // ...
}
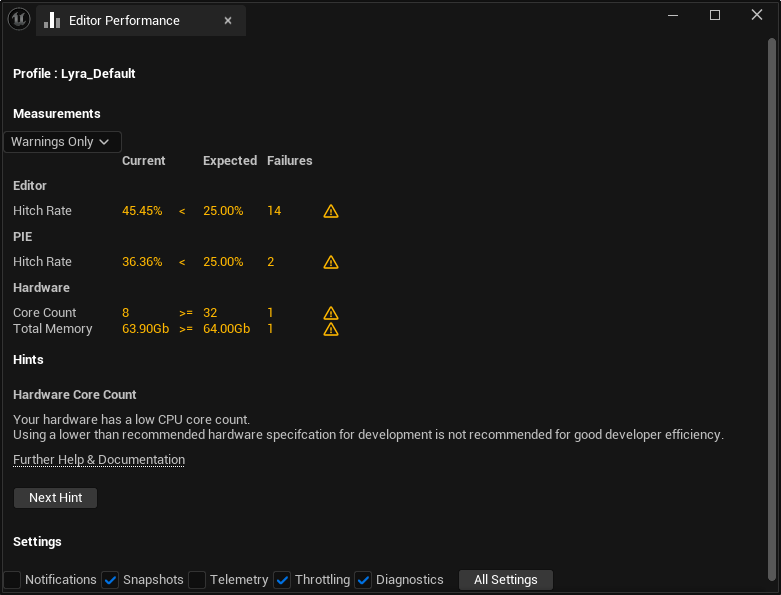
Monitor Editor Performance
Unreal has a built in Editor Performance Monitor, which can be enabled in the editor preferences. This tool allows us to monitor the performance of the editor and identify any potential bottlenecks. This is especially useful when working with large projects or when we want to optimize the performance of our game.
Enable editor performance tool in editor preference: 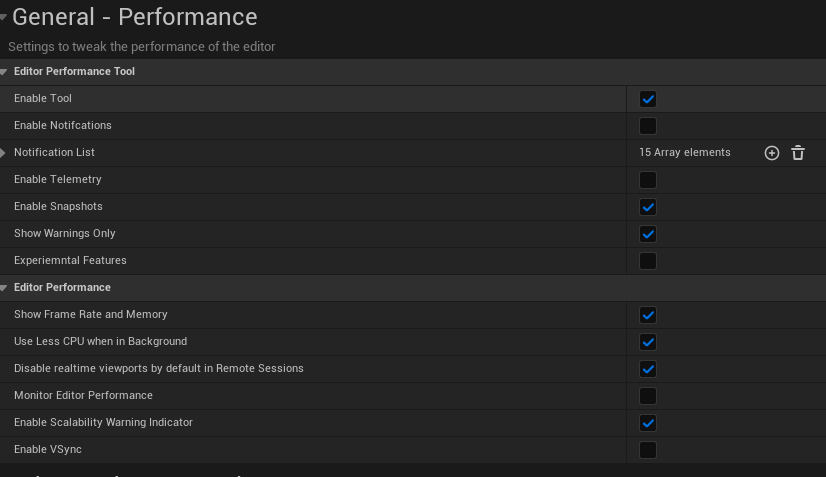
Then, we can check the performance report at the bottom toolbar: 
For each related category, there’s a hint to describe what the potential pitfall is: