From Blueprint to Bytecode V - Bytecode and Game
Great enemies fallen, the adventurers move forward. Deep down the castle, a humongous machine is working on countless tiny pieces, pointers jumping back and forth, carrying EExprToken around. We are so close to the heart of the secret - Bytecode
The content in this post is based on Unreal Engine 5.4.0
If I made a mistake, please comment below and help future readers!
The Story So Far
We have been exploring the compiling process of a blueprint in Unreal Engine, from hitting the Compile button all the way to the numerous EExprToken being emitted to a serialized form, but we havent yet actually see them in a real world case. So in this post, we will create a simple blueprint, add a bit of logics to it, and then analyze the bytecode generated from it. We will also discuss a bit on where this learning can be applied in real world game development. Without further ado, let’s get started.
Prerequisite
From this section in previous post, we know that bytecode generated are actually also being deserialized to a human readable form, as long as bDisplayBytecode is set to true. This value is reading from CompileDisplaysBinaryBackend. So we will need to set this flag in the DefaultEngine.ini file.
1
2
3
4
5
6
bool bDisplayBytecode = false;

if (!Blueprint->bIsRegeneratingOnLoad)
{
    GConfig->GetBool(TEXT("Kismet"), TEXT("CompileDisplaysBinaryBackend"), /*out*/ bDisplayBytecode, GEngineIni);
}
1
2
[Kismet]
CompileDisplaysBinaryBackend=True
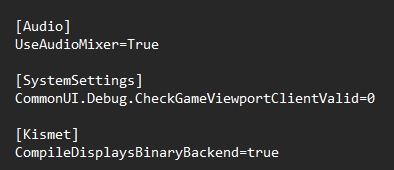 Enabling bytecode log in DefaultEngine.ini
Create a Blueprint Asset
Great, the rest is pretty simple, we just right click in the content browser, and create a new blueprint, let’s select Actor as the parent class, and name it BPA_ByteCode. (Or whatever name you like)
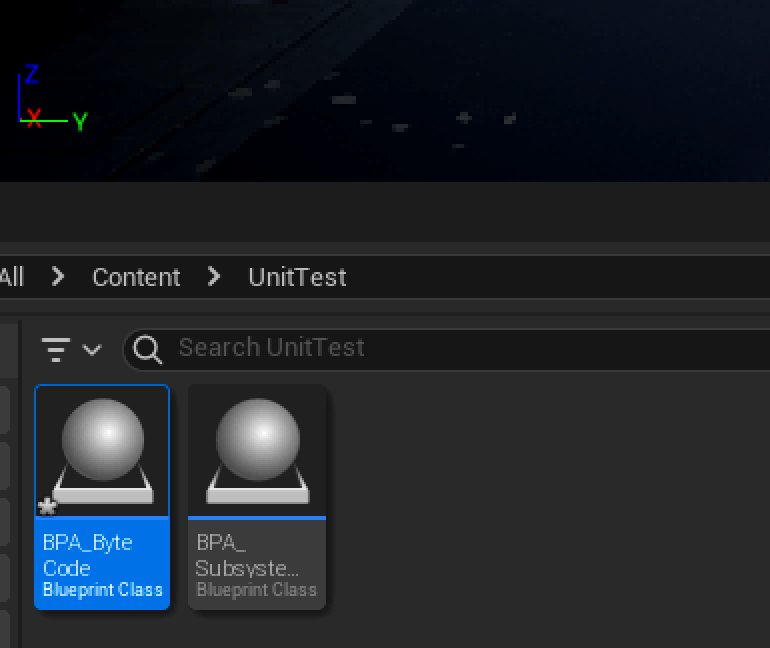 Creating a new blueprint asset
In this example, we are going to create a blueprint actor that will have a StringToPrint FString type of variable, and a custom function CustomPrintString that will print the string to the output log and screen. Then call them upon BeginPlay event.
 Adding a new variable to the blueprint
Add a custom function
Create a new function, name it CustomPrintString, and set the return type to FString. This function will take in a FString type of input parameter, assign it to a local variable and print it, then pass the value in the local variable to the output parameter.
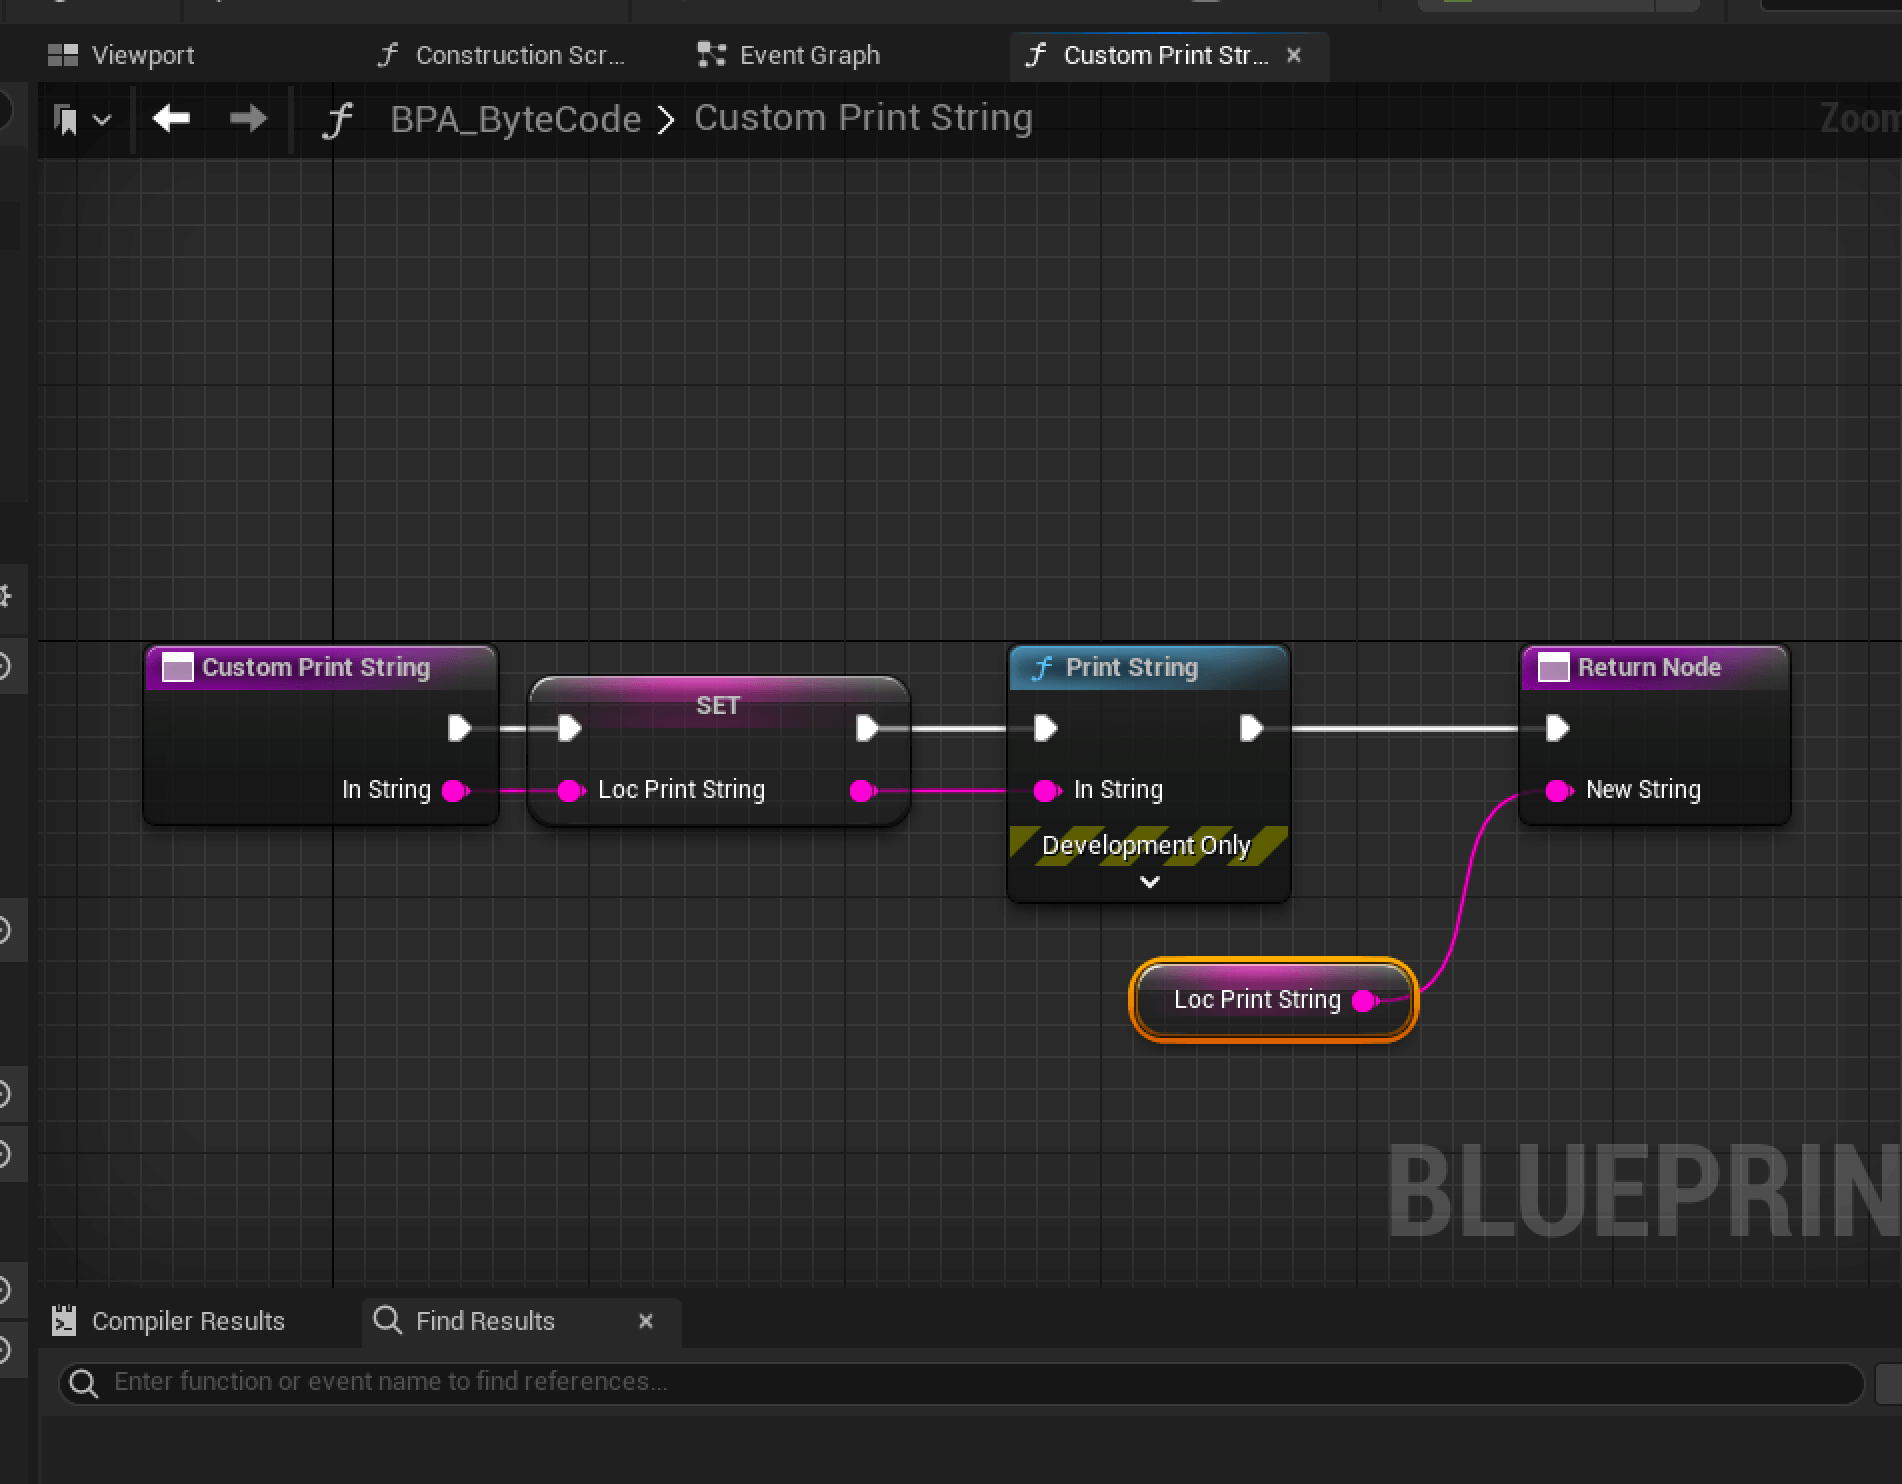 Adding a custom function to the blueprint
Call the function in event graph
In the event graph, drag out from the BeginPlay event, and call the CustomPrintString function. Then pass in the StringToPrint variable as the input parameter.
 Calling the custom function in event graph
Compile
Now we can hit the compile and wait the magic to happen.
Note once the compile is finished, moving the nodes around doesn’t make the blueprint dirty (Need to recompile), as the connection of nodes are not being changed, only the visual representations are. Everything that actually would make the blueprint to recompile would explicitly set the Blueprint state to BS_Dirty
1
2
3
4
5
6
7
8
9
10
11
12
13
14
15
16
17
18
19
20
/**
 * Enumerates states a blueprint can be in.
 */
UENUM()
enum EBlueprintStatus : int
{
    /** Blueprint is in an unknown state. */
    BS_Unknown,
    /** Blueprint has been modified but not recompiled. */
    BS_Dirty,
    /** Blueprint tried but failed to be compiled. */
    BS_Error,
    /** Blueprint has been compiled since it was last modified. */
    BS_UpToDate,
    /** Blueprint is in the process of being created for the first time. */
    BS_BeingCreated,
    /** Blueprint has been compiled since it was last modified. There are warnings. */
    BS_UpToDateWithWarnings,
    BS_MAX,
};
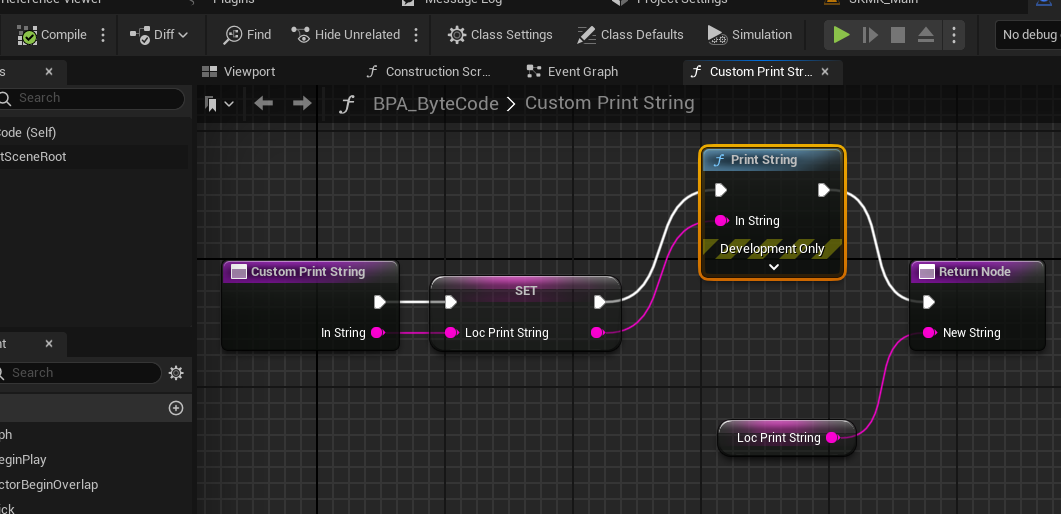 Moving nodes around doesn’t make the blueprint dirty
Inspect Output
Depends on your IDE and platform, the bytecode might look a little bit different visually from mine (differnet color, extra lines, etc), but the content should be the same (The image below is on JetBrains Rider on Mac OS)
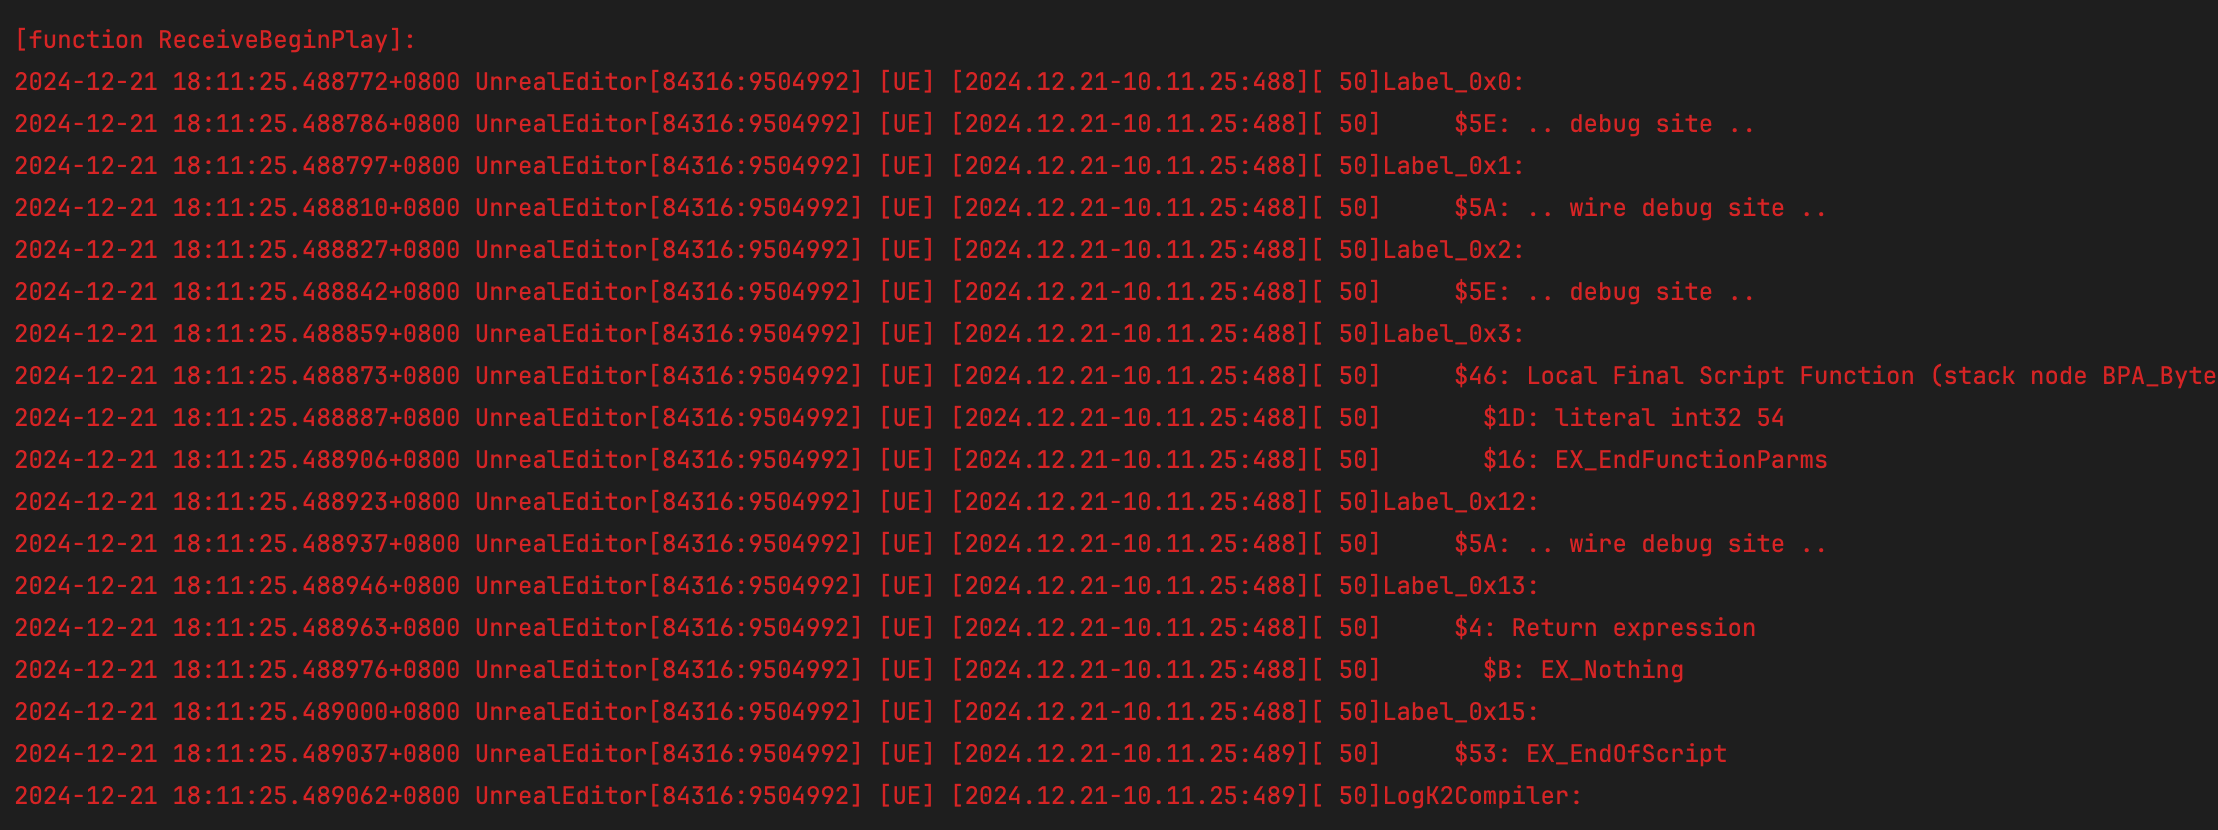
We should be able to find a wall of text that looks like this in our IDE’s console, and that’s our bytecode generated! Let’s analyze it.
Bytecode Analysis
First of all, we should be able to quickly notice some obvious patterns:
- LogK2Compiler: [function XXX]
- This reprensents a chunk of function, where
XXXis the function name.
- This reprensents a chunk of function, where
- Label_0xXX:
- This represents a label, where
XXis the offset of the bytecode from the beginning of the function.
- This represents a label, where
- $X:
- This represents an
EExprToken. It could be a data or an instruction.
- This represents an
- EX_EndOfScript:
- This represents the end of the bytecode of the current function.
1
2
3
4
5
6
7
8
9
10
11
12
13
14
15
16
17
18
19
20
21
22
23
24
25
26
27
28
29
LogK2Compiler:
[function ExecuteUbergraph_BPA_ByteCode]:
Label_0x0:
     $4E: Computed Jump, offset specified by expression:
         $0: Local variable of type int32 named EntryPoint. Parameter flags: (Parameter).
{...}
Label_0x38:
     $4: Return expression
       $B: EX_Nothing
Label_0x3A:
     $53: EX_EndOfScript

LogK2Compiler:
[function ReceiveBeginPlay]:
{...}
Label_0x13:
     $4: Return expression
       $B: EX_Nothing
Label_0x15:
     $53: EX_EndOfScript

LogK2Compiler:
[function CustomPrintString]:
{...}
Label_0x88:
     $4: Return expression
       $B: EX_Nothing
Label_0x8A:
     $53: EX_EndOfScript
It’s also very important that the execution of the whole bytecode is not starting from the very beginning, in this case, ExecuteUbergraph_BPA_ByteCode, but rather jump back and forth, so we will need to find out where the entry point is.
From BeginPlay to ReceiveBeginPlay
After the actor is spawned and ready, BeginPlay will be triggered, an experienced Unreal Developer would realize that this BeginPlay is not the native BeginPlay function we are calling in C++ side, but rather a BlueprintImplementableEvent that has a custom name “BeginPlay”. So this is the starting point of our bytecode execution. (We will talk about this process in detail in future posts)
1
2
3
4
5
6
7
8
9
10
11
12
13
void AActor::BeginPlay()
{
    // Other code
    // Also call BeginPlay() for components

    ReceiveBeginPlay();

    ActorHasBegunPlay = EActorBeginPlayState::HasBegunPlay;
}

/** Event when play begins for this actor. */
UFUNCTION(BlueprintImplementableEvent, meta=(DisplayName = "BeginPlay"))
ENGINE_API void ReceiveBeginPlay();
Let’s take a look at the logic flow, upon starting the function, it will jump to Label_0x0, then to Label_0x1, then back to Label_0x2, so on and so forth. As we can see that this whole function is merely just a wrapper to the actual implementation in Ubergraph, this yields a very important information for BlueprintImplementableEvent and BlueprintNativeEvent, the implementation we had in event graph is just their implementation, a seperate function graph is created during compilation and wired the logic into the Ubergraph during execution.
- 0x0:
- debug site, no effect on execution, this is used for breakpoint mapping.
- 0x1:
- wire debug site, no effect on execution, this is used for breakpoint mapping.
- 0x2:
- debug site, no effect on execution, this is used for breakpoint mapping.
- 0x3:
- Local Final Script Function (stack node BPA_ByteCode_C::ExecuteUbergraph_BPA_ByteCode)
- literal int32 49
- EX_EndFunctionParms
- This pushes a new stack, it will enter
BPA_BytecCode_C::ExecuteUbergraph_BPA_ByteCodefunction, a parameter is passed in, with value49. By converting this value to hex, we get0x31
- Local Final Script Function (stack node BPA_ByteCode_C::ExecuteUbergraph_BPA_ByteCode)
- 0x12:
- At this time, the function stack pops back, meaning the execution has finished, the flow continues. Another wire debug site, no effect on execution, this is used for breakpoint mapping.
- 0x13:
- Return expression, no value is returned, (This has nothing to do with the function’s “Return Node”, more on this later)
- 0x15:
- End of script, this is the end of the function.
1
2
3
4
5
6
7
8
9
10
11
12
13
14
15
16
17
18
19
LogK2Compiler:
[function ReceiveBeginPlay]:
Label_0x0:
     $5E: .. debug site ..
Label_0x1:
     $5A: .. wire debug site ..
Label_0x2:
     $5E: .. debug site ..
Label_0x3:
     $46: Local Final Script Function (stack node BPA_ByteCode_C::ExecuteUbergraph_BPA_ByteCode)
       $1D: literal int32 49
       $16: EX_EndFunctionParms
Label_0x12:
     $5A: .. wire debug site ..
Label_0x13:
     $4: Return expression
       $B: EX_Nothing
Label_0x15:
     $53: EX_EndOfScript
Great, looks pretty simple, now let’s take a closer look at 0x3, where we pushed a stack for executing Ubergraph, a literal int32 49 is passed in, this gets converted to 0x31 as hex, which is the offset of the bytecode in ExecuteUbergraph_BPA_ByteCode. This is how the bytecode jumps to the actual implementation of the BeginPlay event.
ExecuteUbergraph_BPA_ByteCode
Start with ExecuteUbergraph_BPA_ByteCode, from the name and previous knowledge, we know that this represents the whole event graph merged together. And it expects a parameter EntryPoint to be passed in, so that it can jump to different parts of the bytecode. The following order is a simulation of the bytecode execution flow.
- 0x0:
- Computed Jump, offset specified by expression:
- Evaluated the input parameter, and jump to
0x31.
- Evaluated the input parameter, and jump to
- Computed Jump, offset specified by expression:
- 0x31:
- debug site, no effect on execution, this is used for breakpoint mapping.
- 0x32:
- wire debug site, no effect on execution, this is used for breakpoint mapping.
- 0x33:
- Jump to offset 0xA.
- 0xA:
- debug site, no effect on execution, this is used for breakpoint mapping.
- 0xB:
- Local Virtual Script Function named
CustomPrintString- Instance variable of type
FStringnamedStringToPrint. - Local variable of type
FStringnamedCallFunc_CustomPrintString_NewString. EX_EndFunctionParms
- Instance variable of type
- This is where the
CustomPrintStringfunction is called, with theStringToPrintvariable as the parameter.
- Local Virtual Script Function named
- 0x2B:
- Same old, at this point, the inner function has finished exectution. This is another wire debug site, no effect on execution, this is used for breakpoint mapping.
- 0x2C:
- Another jump to 0x38.
- 0x38:
- Return expression, no value is returned.
- 0x3A:
- End of script, this is the end of the function.
1
2
3
4
5
6
7
8
9
10
11
12
13
14
15
16
17
18
19
20
21
22
23
24
25
26
27
LogK2Compiler:
[function ExecuteUbergraph_BPA_ByteCode]:
Label_0x0:
     $4E: Computed Jump, offset specified by expression:
         $0: Local variable of type int32 named EntryPoint. Parameter flags: (Parameter).
Label_0xA:
     $5E: .. debug site ..
Label_0xB:
     $45: Local Virtual Script Function named CustomPrintString
       $1: Instance variable of type FString named StringToPrint.
       $0: Local variable of type FString named CallFunc_CustomPrintString_NewString.
       $16: EX_EndFunctionParms
Label_0x2B:
     $5A: .. wire debug site ..
Label_0x2C:
     $6: Jump to offset 0x38
Label_0x31:
     $5E: .. debug site ..
Label_0x32:
     $5A: .. wire debug site ..
Label_0x33:
     $6: Jump to offset 0xA
Label_0x38:
     $4: Return expression
       $B: EX_Nothing
Label_0x3A:
     $53: EX_EndOfScript
At ExecuteUbergraph_BPA_ByteCode: Label_0xB This instruction calls a local virtual script function named CustomPrintString, and try to pass in the StringToPrint instance variable as the parameter. The EX_EndFunctionParms indicates the end of the function parameters.
$1: StringToPrint — An instance variable of type FString that holds the string to be printed.
$0: CallFunc_CustomPrintString_NewString — A local variable of type FString that stores the result of StringToPrint (slightly like how assembly calls a function, a external value is captured and copied to the local scope*).
$16: EX_EndFunctionParms — Indicates the end of function parameters.
1
2
3
4
5
Label_0xB:
     $45: Local Virtual Script Function named CustomPrintString
       $1: Instance variable of type FString named StringToPrint.
       $0: Local variable of type FString named CallFunc_CustomPrintString_NewString.
       $16: EX_EndFunctionParms
*Technically, the assembly code would push the value of the parameter to the stack, and then call the function. The function would then pop the value from the stack and use it. In this case, the value is copied to a local variable, which is a more high-level abstraction. Also note that if we are compiling assembly with compiler optimization, the value might be passed directly to the function without any copying. But of course this is not the case in Blueprint VM.
CustomPrintString
The execution of CustomPrintString is pretty simple, it just calls the PrintString function from KismetSystemLibrary, and then returns the value.
- 0x0:
- debug site, no effect on execution, this is used for breakpoint mapping.
- 0x1:
- wire debug site, no effect on execution, this is used for breakpoint mapping.
- 0x2:
- debug site, no effect on execution, this is used for breakpoint mapping.
- 0x3:
- Let (Variable = Expression)
- Variable:
- Local variable of type
FStringnamedLocPrintString.
- Local variable of type
- Expression:
- Local variable of type
FStringnamedInString. Parameter flags: (Parameter).
- Local variable of type
- Variable:
- This is where the input parameter is copied to a local variable.
LocPrintString
- Let (Variable = Expression)
- 0x1E:
- wire debug site, no effect on execution, this is used for breakpoint mapping.
- 0x1F:
- debug site, no effect on execution, this is used for breakpoint mapping.
- 0x20:
- Call Math (stack node
KismetSystemLibrary::PrintString)EX_Self- Local variable of type
FStringnamedLocPrintString. EX_TrueEX_True- literal struct
LinearColor(serialized size: 16)- literal float 0.000000
- literal float 0.660000
- literal float 1.000000
- literal float 1.000000
EX_EndStructConst
- literal float 2.000000
- literal name
None EX_EndFunctionParms
- This is where the
PrintStringfunction is called, following the signature ofPrintStringfunction, all the parameters are passed in.
- Call Math (stack node
- 0x6A:
- wire debug site, no effect on execution, this is used for breakpoint mapping.
- 0x6B:
- debug site, no effect on execution, this is used for breakpoint mapping.
- 0x6C:
- Let (Variable = Expression)
- Variable:
- Local out variable of type
FStringnamedNewString. Parameter flags: (Parameter,Out).
- Local out variable of type
- Expression:
- Local variable of type
FStringnamedLocPrintString.
- Local variable of type
- Variable:
- This is where the output parameter is copied to a local variable.
NewString
- Let (Variable = Expression)
- 0x87:
- wire debug site, no effect on execution, this is used for breakpoint mapping.
- 0x88:
- Return expression
EX_Nothing
- Return expression
- 0x8A:
- End of script, this is the end of the function.
 Bytecode agrees with implementation
1
2
3
4
5
6
7
8
9
10
11
12
13
14
15
16
17
18
19
20
21
22
23
24
25
26
27
28
29
30
31
32
33
34
35
36
37
38
39
40
41
42
43
44
45
46
47
48
49
50
LogK2Compiler:
[function CustomPrintString]:
Label_0x0:
     $5E: .. debug site ..
Label_0x1:
     $5A: .. wire debug site ..
Label_0x2:
     $5E: .. debug site ..
Label_0x3:
     $F: Let (Variable = Expression)
       Variable:
         $0: Local variable of type FString named LocPrintString.
       Expression:
         $0: Local variable of type FString named InString. Parameter flags: (Parameter).
Label_0x1E:
     $5A: .. wire debug site ..
Label_0x1F:
     $5E: .. debug site ..
Label_0x20:
     $68: Call Math (stack node KismetSystemLibrary::PrintString)
       $17: EX_Self
       $0: Local variable of type FString named LocPrintString.
       $27: EX_True
       $27: EX_True
       $2F: literal struct LinearColor (serialized size: 16)
         $1E: literal float 0.000000
         $1E: literal float 0.660000
         $1E: literal float 1.000000
         $1E: literal float 1.000000
         $30: EX_EndStructConst
       $1E: literal float 2.000000
       $21: literal name None
       $16: EX_EndFunctionParms
Label_0x6A:
     $5A: .. wire debug site ..
Label_0x6B:
     $5E: .. debug site ..
Label_0x6C:
     $F: Let (Variable = Expression)
       Variable:
         $48: Local out variable of type FString named NewString. Parameter flags: (Parameter,Out).
       Expression:
         $0: Local variable of type FString named LocPrintString.
Label_0x87:
     $5A: .. wire debug site ..
Label_0x88:
     $4: Return expression
       $B: EX_Nothing
Label_0x8A:
     $53: EX_EndOfScript
One more thing
There’s one last thing that’s still a bit off: Seems like the EX_Return instruction in the end always have an EX_Nothing as the return value, yet we clearly created an output for our custom function! I personally have no idea why this design choice is made, but from the code this behavior is explainable.
Return expression of a function
Let’s take a look at where does this EX_Return coming from, basically it’s write to the stream via EmitReturn() function, which will be called if a FBlueprintCompiledStatement’s type is KCST_Return, and this is assigned during the ConstructFunction() process
1
2
3
4
5
6
7
8
9
10
11
12
13
void FKismetCompilerVMBackend::ConstructFunction(FKismetFunctionContext& FunctionContext, bool bIsUbergraph, bool bGenerateStubOnly)
{
    // ... Other code

    // Return statement, to push on FlowStack or to use with _GotoReturn
    FBlueprintCompiledStatement ReturnStatement;
    ReturnStatement.Type = KCST_Return;

    // ... Process function body

    // Handle the function return value
    ScriptWriter.GenerateCodeForStatement(CompilerContext, FunctionContext, ReturnStatement, nullptr);
}
As can be seen here, this “Return” seems to just used to jump to an address, and it not the actual return that we defined in the function, becuase it doesn’t feel like a UEdGraphNode. Let’s take a look at the actual Return node in the graph then, we know that it must be a UK2Node derived class, so we can just search in code base for a UK2Node class with name “Return Node”
The Return Node
We quickly found a candidate, UK2Node_FunctionResult, in it’s GetNodeTitle() function, it’s name get’s overriden to “Return Node”. This must be it!
1
2
3
4
5
6
7
8
FText UK2Node_FunctionResult::GetNodeTitle(ENodeTitleType::Type TitleType) const
{
    if (ENodeTitleType::MenuTitle == TitleType)
    {
        return NSLOCTEXT("K2Node", "ReturnNodeMenuTitle", "Add Return Node...");
    }
    return NSLOCTEXT("K2Node", "ReturnNode", "Return Node");
}
Return Node Bytecode
We know that this node must have a corresponding FNodeHandlingFunctor to handle the bytecode generation, so we can take a look at its CreateNodeHandler() function
1
2
3
4
FNodeHandlingFunctor* UK2Node_FunctionResult::CreateNodeHandler(FKismetCompilerContext& CompilerContext) const
{
    return new FKCHandler_FunctionResult(CompilerContext);
}
There we go, FKCHandler_FunctionResult, now let’s take a look at its Compile() function. From which we can clearly see that for a normal function, GenerateAssignment() are called for all the output pins, then this last FBlueprintCompiledStatement type is KCST_GotoReturn and being append to the list.
1
2
3
4
5
6
7
8
9
10
11
12
13
14
15
16
17
18
19
20
21
22
23
24
25
virtual void Compile(FKismetFunctionContext& Context, UEdGraphNode* Node) override
{
    static const FBoolConfigValueHelper ExecutionAfterReturn(TEXT("Kismet"), TEXT("bExecutionAfterReturn"), GEngineIni);

    if (ExecutionAfterReturn)
    {
        // for backward compatibility only
        FKCHandler_VariableSet::Compile(Context, Node);
    }
    else
    {
        GenerateAssigments(Context, Node);

        if (Context.IsDebuggingOrInstrumentationRequired() && Node)
        {
            FBlueprintCompiledStatement& TraceStatement = Context.AppendStatementForNode(Node);
            TraceStatement.Type = Context.GetWireTraceType();
            TraceStatement.Comment = Node->NodeComment.IsEmpty() ? Node->GetName() : Node->NodeComment;
        }

        // always go to return
        FBlueprintCompiledStatement& GotoStatement = Context.AppendStatementForNode(Node);
        GotoStatement.Type = KCST_GotoReturn;
    }
}
GenerateAssigments()
This function essentially calls FKCHandler_VariableSet::InnerAssignment() for each output pin, which then calls FKismetCompilerUtilities::CreateObjectAssignmentStatement(), where it creates a statment of type KCST_Assignment
1
2
3
4
FBlueprintCompiledStatement& Statement = Context.AppendStatementForNode(Node);
Statement.Type = KCST_Assignment;
Statement.LHS = DstTerm;
Statement.RHS.Add(RHSTerm);
EmitAssignmentStatement()
This function will emit corresponding bytecode based on the type of the property, the magic happens in EmitDestinationExpression()
1
2
3
4
5
6
7
8
9
void EmitAssignmentStatment(FBlueprintCompiledStatement& Statement)
{
    FBPTerminal* DestinationExpression = Statement.LHS;
    FBPTerminal* SourceExpression = Statement.RHS[0];

    EmitDestinationExpression(DestinationExpression);

    EmitTerm(SourceExpression, DestinationExpression->AssociatedVarProperty);
}
EmitDestinationExpression()
This function converts the assignement operation to an actual EX_Let instruction, it could be EX_LetBool, EX_LetObject, or just EX_Let if none of the special cases are met, and then it will call EmitTermExpr() Which we already know how it works in previous post.
EmitReturn()
As mentioned before, EmitReturn() gets called when dealing with KCST_Return statement. Technically, it could allow having a return value, but from the codebase, I didn’t actually find any function that has this parameter. Maybe it’s for nodes other than blueprint nodes. So if no return parameter is passed in, a no operation expression EX_Nothing is used. Anyway, since when we enter a function, we always push in a new stack, hence after the function is finished, we need this “Return” to pop the stack and continue the flow.
Fact Check
If our assumption is correct, then at the end of CustomPrintString()’s bytecode, we should see a EX_Let operation, which write a FString variable value to an output parameter named NewString, following with a EX_GotoReturn operation, then an EX_Return operation with EX_Nothing as return parameter, which is the actual return statement of the function. And an EX_EndOfScript to end the function. So what does the code say?
1
2
3
4
5
6
7
8
9
10
11
12
13
Label_0x6C:
     $F: Let (Variable = Expression)
       Variable:
         $48: Local out variable of type FString named NewString. Parameter flags: (Parameter,Out).
       Expression:
         $0: Local variable of type FString named LocPrintString.
Label_0x87:
     $5A: .. wire debug site ..
Label_0x88:
     $4: Return expression
       $B: EX_Nothing
Label_0x8A:
     $53: EX_EndOfScript
EX_Let…check, EX_Return…check…, EX_EndOfScript…check…EX_Nothing…check…Wait! The EX_GotoReturn is missing! Something must have gone wrong!
The Final Missing Piece
Don’t panic, this is actually correct, remember in the last post we mentioned a special step called “MergeAdjacentStates”? The second case indicates that if the EX_GotoReturn is the last statement generated by the last node of the function, it’s removed, since the EX_Return would just handle that anyway. And that’s why we don’t see the EX_GotoReturn in the bytecode. (We can put a breakpoint at the CurStatementList->RemoveAt(CurStatementList->Num() - 1); to prove this)
Boom, we have successfully analyzed the bytecode generated from a simple blueprint. The whole process is pretty simple, but it gives us a lot of insights on how the blueprint is being compiled and executed.
Key Takeaways
There’re few obvious takeaways:
- For any functions or custom events defined in Event Graph, there’s always a seperate function graph being generated, this act as a wrapper and the bytecode will eventually jump to the corresponding function stub label offset location in
Ubergraph - This gives us a pretty good idea on why the blueprint is slow comparing with C++ code, the BPVM is doing a lot of copying and stack management, adding overhead and various jumpings to make the logic flow, which a lot of them are unnecessary in C++.
- In the example we demonstrated, all the literal values are being copied over, we could specify the blueprint to pass values as reference, as well as using
UPARAM(ref)in C++ function signature to avoid unnecessary copying.
- In the example we demonstrated, all the literal values are being copied over, we could specify the blueprint to pass values as reference, as well as using
FKismetCompilerContextwill do a bit of optimization during the compilation, however this is far less powerful comparing with the optimization done by C++ compiler. Most optimizations in bytecode are done on theEExprTokenandFBlueprintCompiledStatementlevel, while an full-fledged C++ compiler can do it at the assembly level.- Calling a function from C++ that defined in blueprint will be costly, but calling a function from blueprint that defined in C++ will be much faster, as it almost only involves a
EX_CallFunctioninstruction back to the C++ side, and C++ will handle the rest with an incomparable speed.- That also clearly explains why the best practice is to put the heavy lifting in C++ side, and only use blueprint for high-level logic and game design.
The term “Slow” here is just a relative term, it’s a measurement of how many more instructions (and eventually, CPU cycles) are needed in Blueprint to achieve the same thing in C++, but with multi-threading and async task, the real performance difference might not be that significant. (I don’t have a benchmark to back this statement though)
Where to go from here
As we reached the end of this Epic journey (Literally XD), we might kept wondering, why do we even need to know this? Does the whole series just proves an already proven fact that C++ is faster than blueprint? Well not really, besides it’s fun to know, there’re a lot of spaces to explore from there:
- We can create a specific type of blueprint, and make a whole new editor for it, just like how the
Animation BlueprintorBehaviore Treeworks, and then we can create new systems for gameplays that can be easily used by designers.- A common case would be RPG framework, where we can write a custom
DialogueandQuesteditor, so that designers can easily create new dialogues and quests without touching the code. We can customize the flow to have our own FSM, then override the compile proces to make sure they can be executed properly.
- A common case would be RPG framework, where we can write a custom
- We can create a custom class that inherit from
FKismetCompilerContextand then override theCompilefunction, so that we can do some custom optimization, add new instructions to the bytecode or even do backward compatibility cleanups for outdated player data. - It help us to have a better understanding of the compile process, especially the order, so when we try to jam our code to the engine, we won’t be lost too quickly in the swarm of source. (We are likely still gonna be lost at some point :D)
- It helped us understand a bit more on how such a custom scripting language would be implemented, so if we are going to write our own script for our own engine, this is a top-notch reference.
- The idea of abstrate away the nasty details of implementation but let a compiler to write the full code for us is a very powerful concept, because
UHT(Unreal Header Tool) are also doing the same thing, ever wondered why the C++ header would always include axx.generated.hand theIntermediatefolder would always have a bunch ofxx.gen.cpp? That’s the magic ofUHTdoing the heavy lifting and write code for us.- We will talk about
UHTin the future, understandUHTbehavior will unlocks us the ability to createCustomThunkfor a function, which tells theUHTto take a rest and we will manually write the compiled code. This effectively unleashing the full power of the engine to us.
- We will talk about
That’s it for this series, I hope you enjoyed it as much as I do. If there’s any questions, mistakes or stuff to discuss, feel free to comment down below to help future readers :D. Until next time, happy coding and have a great day!
